01 October, 2010

Merge PDF easily using PDF Merge Tool

PDF Merge Tool by Darren Wurf is a no frill, simple, light, effective and portable tool for merging multiple PDF files into a single PDF document. It does what it is expected to do - merging PDF files - and it does the job in a very silent and effective manner.
This is how the main window of PDF Merge Tool looks like:

[click the image for enlarged view]
  1. Click on the Add button to add PDF files; you can add multiple PDF files at once.
  2. Set the order of the pages in the final PDF file using the "Move Up" and "Move Down" button.
  3. Click on the "Merge" button to to merge the files. You will get a "Save As" dialog box.
  4. Select a name of for your file and save it at desired location.
  5. You are done!

[click the image for enlarged view]

PDF Merge Tool requires .NET framework v2 and the PDFSharp library.
Get the Portable version of PDF Merge Tool from Softpedia.com

New Image Upload Window at Blogger

Blogger has redesigned the "Add Image" window. Now you can add images from your Picasa Web Albums or photos that you uploaded to your blog earlier. The option of uploading images from your computer or from an external URL is still there.

New Blogger Add Image Window
[Click image to view enlarged]


Create Multiple Folders Using File Names & Move File To Them

In my previous post I wrote about how you can generate folders from file names using WinRAR.
However there is an even simpler way to accomplish this task - FoldMonkey.
Using FoldMonkey you can create folders from file names and copy or move your files to these new folders.

This is the FoldMonkey main screen: [click the image for enlarged view]


To create folders from the file names follow the following precedure:

1. Select (check) the "Archive File" option.
2. Select (check) the "Create Folder" option.
3. Select "Add Old File Name Without .Extension" from the drop down menu next to the entry box.
4. Uncheck the "Folder Path" option.
5. Select "Move File To The Above Created Folder".
6. Click the "Scan Once Only" button.

The folders will be created. [click the image for enlarged view]


Get FoldMonkey Now

20 September, 2010

Create Multiple Folders Using Filenames

If you want to create multiple folders using filenames here is a simple way. You will however require WinRAR for this method. If you don't have WinRAR you can download a trial copy from here.
Here is how to do it:

11 August, 2010

Play Synonym Game

You can test your knowledge of Synonyms in the form of a game.
Sadlier-Oxford.com page provides a cool way to improve your word power.
You will be shown a word, it will remain fix on the screen. Other words will show and disappear. You will have to choose from them the word which you think is the closest in meaning of the 'fixed' word and click on the round button on the left side of thescreen. If your guess is right you will be awarded 200 points, else 100 points will be deducted. A green bar on the right will tell you how fast you were.

07 July, 2010

New Indian Railways Website

If you have ever visited the Indian Railways website than you already know how frustrating it is; it throws a hundred pop-ups at the visitor and is damn! slow. Also it sometimes just hang and lacks information like route maps.
Here is a new Indian railways website - http://indiarailinfo.com/. This website is not affiliated to Indian railways. It provides information in a simple manner and doesn't show any pop-ups. Here are some screenshots to show what it actually looks like:

1. This is the home page - you can see there are no images, hence the page loads faster. To get information about any train use the text boxes.
Here I used the train number '2955' Mumbai Central-Jaipur Express  as an example.


All the information regarding the train will be shown. The departure time, number of halts, platform number, and route length in kilometers.
Apart from this general information you can also get the route map. Click on the 'Route Map/Live Status' tab.

This is the route map of the train - 2955. You may click the image for an enlarged view.

Click on the 'Fares and Seats' tab to get the information about fares and seat availability.
You will be shown the complete information for the train.

This website is far better than the Indian Railways website. The information is presented in a simple and easy to find manner. You don't have to click several times or wait for long to get any information.
I hope you will also find it useful. If you have something to say please feel free to comment.

05 July, 2010

How To Use Google Fonts in Blogger Title and Posts

Now you can add Google Custom Fonts to your Blogger titles and posts. Google fonts are available to everyone via the Google Fonts API. Follow these steps to add Google Fonts to your blog.



1. Go to the Google Fonts directory. You will find fonts like this:
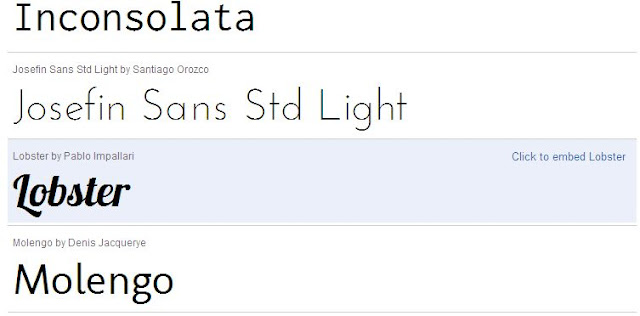


2. Click the link next to the desired font 'Click to embed {Fontname}', where Fontname is the name of font of your choice.

3. You will be taken to the next screen, like this:
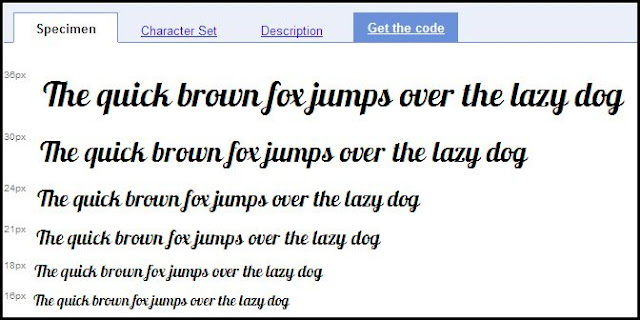


4. Go to the 'Get the Code' tab. You will be given code for the specified font like this:
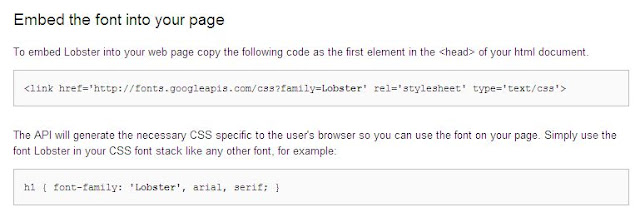


5. Copy the code, it will look like this, here I am using the 'Lobster' font.

<link href='http://fonts.googleapis.com/css?family=Lobster'
rel='stylesheet' type='text/css'/>
Note that the last element has been changed from >  to />. this way your CSS will be parsed correctly and will not give errors.

6. Now go to Blogger > Design > Edit HTML tab. Search for </head> tag.
7. Paste the code from Google API above the </head> code.
8. This way you have inserted Google fonts in your blog. But still you have to define which portion of CSS uses the custom fonts.
This is done by defining styles for each element of the blog like header title, post title etc.

Here are the main CSS elements that you should know to define the fonts styling.

Blog Header Title                                       #header h1 {font-family:FontName;}
Header description                                     .description {font-family:FontName;}
Sidebar Title                                               .sidebar h2 {font-family:FontName;}
Post Title                                                    .post h3 {font-family:FontName;}
Post Body Fonts                                         .post {font-family:FontName;}
Footer Title                                                 #footer h2 {font-family:FontName;}
Whole Template                                          body {font-family:FontName;}
Change the Fontname to your desired font . Thus you have installed Google fonts in your blog.